


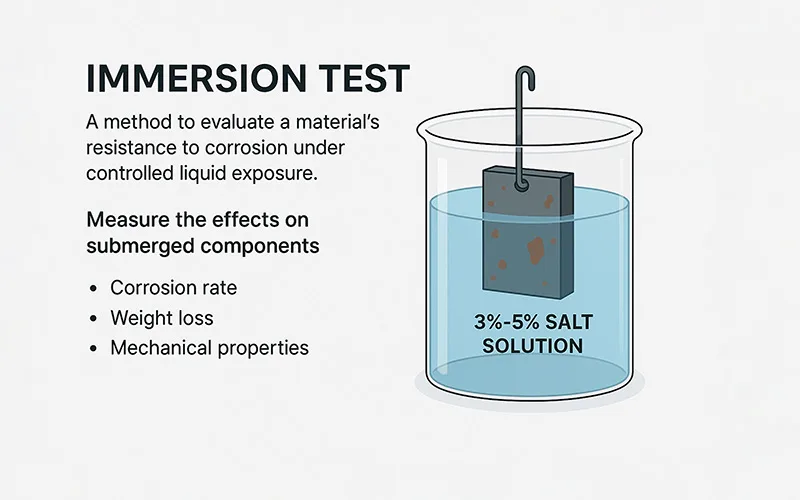
The immersion test is considered one of the most effective corrosion test methods to evaluate a material’s resistance to corrosion under controlled liquid exposure. In this test, the sample components are submerged into a 3%-5% salt solution for a specific period, and the effect is evaluated. The evaluation is done by measuring the corrosion rate, weight loss, and other mechanical properties of the components. The test provides valuable insight while the coating material for manufacturing components of multiple industries such as automotive, engineering and aerospace.
Contents
Why is the Immersion Test Performed?
Immersion test is performed to:
- Evaluate material durability in various liquid environments.
- Predict long-term corrosion assessment to predict the performance of metals and alloys.
- Assist in material selection by comparing corrosion resistance.
- Assess the effectiveness of protective coatings and treatments under immersion conditions.
Immersion Test Process

Components Preparation
The first step in conducting an immersion test is to prepare the specimen or sample components to make the results more realistic. Here are some preparations that are done:
- Usually, the sample components of dimension 2.5 cm × 5 cm × 0.3 cm are taken.
- If there is any sort of possibility of mechanical stress in real conditions, the components may be bent to U-bends, C-rings, or tensile bars.
- To check out the crevice, corrosion holes can be made in it. To simulate crevice corrosion, crevice formers such as washers or shims can be applied.
Pre-Test Cleaning of Component
After preparing the components, they are thoroughly cleaned before being immersed in salt solution. Here, the components are cleaned using either a nylon brush or non-chlorinated scouring and rinsing with distilled water. In this step, any dust, oil or other residue is removed from the component.
Pre Test Measurements
Before immersing the sample components into the solution, their weight and dimensions are measured, which helps calculate the weight loss after the test.
Performing the Immersion Test
Now, the components are suspended in the corrosive solution without contacting each other or the container. The test solution, volume, temperature, and agitation are selected based on the standard under which the test is being performed. For example, the astm g31 immersion corrosion testing conditions are summarized here:
| Parameter | Specifications |
|---|---|
| Solution Composition | 3.5% NaCl (marine simulation) or 1 N HCl (aggressive testing) |
| Temperature Control | 25 ± 2 °C (standard); up to 45 °C for severe conditions |
| pH of Solution | Record initial pH; adjust with HCl or NaOH; maintain if pH affects results |
| Aeration | Aerated – air bubbling; Deaerated – nitrogen or argon bubbling before & during test |
| Solution Velocity | Use flow systems (e.g., stirred solution, rotating cylinder); record type and magnitude |
| Test Duration | Typically 24 to 168 hours; long enough for measurable corrosion without spalling |
Post-Test Inspection
After the test is complete, the components are taken out of the solution, and visual inspection is done. This is usually done by optical magnification to locate corrosion, pitting, or crevice corrosion. Before any cleaning, specimens are visually examined, often using optical magnification, to locate areas of localized attack, such as pitting or crevice corrosion.
Post-Test Cleaning
Finally, the components are cleaned to check the mass loss during immersion accurately. The cleaning is done according to the standards such as ASTM G1 or ASTM G31. After cleaning, components are reweighed to calculate total mass loss.
Corrosion Rate Calculation and Evaluation
In the last step, the corrosion rate is calculated based on mass loss over the exposed surface area and duration of the test. This mass loss is usually expressed in mils per year (mpy) or millimetres per year (mm/y). Here is the formula used to calculate the mass loss:
Corrosion Rate (mpy) = (534 × W) / (D × A × T)
Corrosion Rate (mm/y) = (87.6 × W) / (D × A × T)
Where:
- K = constant to convert units, 534 (mpy), 87.6(mm/y)
- W = weight loss of the specimen (in mg)
- A = exposed surface area (in cm²)
- T = time (in hours)
- D = density (in g/cm³)
Immersion Test Failure Criteria
Here are common failure criteria used in immersion corrosion testing based on ASTM G31 guidance
Excessive Corrosion Rate
If the calculated corrosion rate exceeds acceptable limits for the material or application, the test is considered a failure. These limits can vary depending on the industry and operating environment.
Pitting or Localized Attack
During visual inspection, if localized corrosion such as pits, crevices, or intergranular attack is indicated, it results in the failure of components.
Material Degradation or Surface Damage
Severe surface roughening, discoloration, cracking, or delamination of coatings also indicates failure.
Loss of Mechanical Integrity
If the component loses its tensile strength, hardness or ductility after the immersion test, it is classified as a failure.
Mass Loss Beyond Acceptable Tolerance
In immersion test calculations, the mass loss of a component is measured if it is beyond the expected limit. It also indicates a failure. While mass loss is expected, a weight reduction beyond predefined thresholds indicates excessive corrosion and failure.
Types of Immersion Tests
Water Immersion Test
This test is used to evaluate general corrosion behaviour in natural or simulated water environments. So, how to test for rust in water? Usually In water immersion tests, the components are submerged in water at a specific temperature for a specific duration. The conditions for immersion in water are set according to standards such as ISO 21809-1 and ISO 21809-3.
Chemical Immersion Test
A chemical immersion test is typically used to simulate harsh chemical environments to study specific corrosion mechanisms. In this test, the components are immersed in harsh chemical solutions such as acids, alkalis, or salt solutions. This test is performed to check the component’s resistance to acid attack, alkaline corrosion, or salt-induced corrosion.
Accelerated Immersion Test
This test is typically designed to speed up the corrosion process by using harsher test conditions or chemicals. Here, elevated temperatures, increased solution flow rates, or altered pH are maintained to get the results in a short period.
Applications of Immersion Test
Electronic Components
It is used to check out the performance of various electrical devices, such as connectors, PCBs, and casings, when they are exposed to moisture. Immersion testing of such components ensures that even in humid or contaminated conditions, these components maintain their function without failure.
Plating & Protective Coatings
Immersion testing is also used to evaluate plating or surface coatings, such as nickel plating and zinc plating, and how well they resist corrosion.It helps engineers to choose the right coating and material for components.

Automotive Components
Immersion testing is used in the automotive field, where parts are more prone to exposure mto saltwater, chemicals, and varying temperatures. Here, the parts like bolts, engine housings, or undercarriage components undergoes immersion test. This ensures they resist corrosion and remain durable throughout the vehicle’s service life.
Advantages and Limitations of Immersion test
Advantages of Immersion Test
Simple and Cost-Effective
Immersion testing setups are relatively low-cost compared to electrochemical methods, but precision tests may require controlled-temperature baths or automated dosing systems.
Simulates Real-World Conditions
Immersion test is known for replicating actual service environments such as marine, industrial, or acidic media. So, you can test materials under realistic conditions.
Supports Coating
Immersion testing is highly effective for assessing the performance of protective coatings. It helps to find out how well the coating performs under harsh conditions.
Applicable Across Industries
Immersion testing is versatile and widely used in industries like automotive, marine, and electronics to evaluate durability in liquid environments.
Limitations of Immersion Testing
Time-Consuming for Long-Term Evaluation
Immersion testing can be time-consuming, especially for corrosion-resistant materials. It can take from a few hours to weeks.
Requires Post-Test Cleaning and Analysis
In immersion testing, the final evaluation is done by measuring weight loss, which requires careful cleaning of corrosion products without removing base material. This can increase the risk of error if it is not cleaned carefully.
Lack of Real-Time Monitoring
Unlike electrochemical methods, immersion testing does not allow continuous monitoring of corrosion behaviour.
Potential for Solution Contamination
In long-term immersion testing, the dissolved metal ions can change the chemistry of the solution. It can affect results unless solutions are replaced or monitored regularly.
Immersion Test vs. Salt Spray Test
The following table compares the differences between immersion testing and salt spray testing in detail.
| Aspect | Salt Spray Test | Immersion Test |
|---|---|---|
| Exposure | Exposes parts to a salt fog in air | Fully submerges parts in a liquid solution |
| Environment simulated | Atmospheric corrosion (e.g., coastal air) | Liquid contact corrosion (e.g., submerged parts) |
| Common Standard | ASTM B117 | ASTM G31 |
| Typical Solution | 5% NaCl atomized into fog | 3–5% NaCl or acid solution in liquid form |
| Application Style | Dry chamber with sprayed brine | Tank with completely immersed samples |
| Purpose | Accelerated test of coatings or paint in air | Evaluate material or coating in submerged use |