The Brinell Hardness Test is one of the oldest and most commonly used methods in analyzing metallic materials in material science, engineering, and other applications. It remains a dependable choice in determining material hardness, though newer methods have come into play. The Brinell hardness test is especially useful for materials with large, coarse grains.
Contents
What is Brinell Hardness Test?
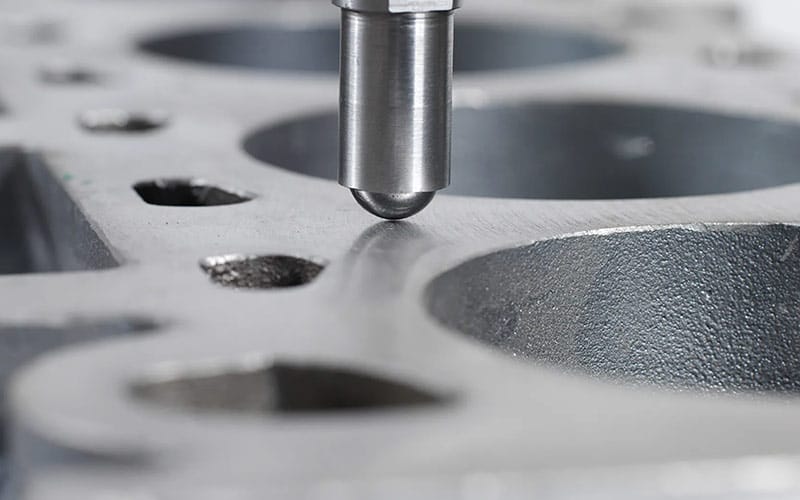
This test became the first standard for methods used to assess the hardness of metal in 1900, when it was introduced by Johan August Brinell, a Swedish engineer. Now, it still plays an important role in quality control, manufacturing, and metallurgy globally. The Brinell Hardness Test is a mechanical test commonly used to evaluate the hardness of materials like metals and alloys. This process is done by making an indentation on the test material with the use of an indenter, while applying a known load. The Brinell Hardness Test, BHT, follows a series of procedures which you will get to see as we progress, and it is efficient for coarse and heterogeneous materials like castings and forgings.

Principle of the Brinell Test
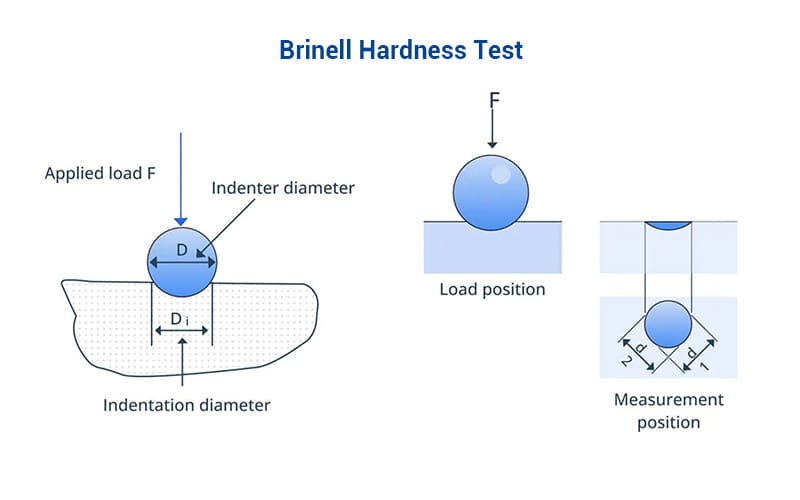
The core principle of the Brinell Test includes the use of a hard spherical indenter pierced into the test material using a standardized load for a particular duration. The indenter is usually a hardened steel or tungsten carbide ball within the size range of 10 mm in diameter. The standardized load applied, ranges from 500 kgf to 3000 kgf, with reference to the test material. This is done for a duration of about 10 to 15 seconds known as the dwell time, before measurements are taken.
Brinell Hardness Test Procedure
Here is a step-by-step procedure of how to conduct the Brinell hardness test:
Preparing the Test Sample
The surface of the test sample is properly prepared by cleaning or polishing with abrasives to ensure that it is smooth and free of any contaminants as well. This is done to ensure a precise indentation and prevent any errors in the measurements.
Selecting Ball Size
The standard ball size of 10 mm ball is used for standard tests, though it can be smaller, from about 2.5 to 5 mm for softer or thinner materials.
Choosing the Load
Choose a load range from 500 to 3000 kgf, depending on the nature of the test material. Pick 500 kgf for softer materials like aluminum alloys, lead, etc. 1500 kgf works for bronze and brass, while 3000 kgf is ideal for steels and cast irons.
Load Time and Duration
Apply the chosen load for a dwell time of about 10 to 15 seconds using a system that allows consistency to avoid errors during testing. The dwell time you will choose will also depend on the type of material being tested.
Measuring the Indentation
Measure the diameter of two axes that are perpendicular to each other (900), and take the mean or average. At least two readings should be taken to avoid error and promote accuracy.
Brinell Hardness Test Calculation
If you are using a manual system, insert the values measured into the formula to calculate the Brinell Hardness Number. However, an automated system can get you instant results.

Applications of the Brinell Hardness Test
Because the Brinell hardness test produces a relatively large indentation, it is more appropriate for testing large specimens with coarse or uneven grain structures, such as forgings and cast components.
Testing Soft to Medium-Hard Metals
Brinell testing works well on cast iron, aluminum alloys, brass, and mild steel. These materials allow clear indentations without harming the surface.
Large and Non-Uniform Components
It’s ideal for large parts like castings, forgings, and steel plates. The 10 mm ball indenter gives stable results on rough or uneven surfaces.
Heat Treatment Monitoring
The test helps compare hardness before and after heat treatments like annealing or tempering, confirming if the desired effect is achieved.
Weld Zone Evaluation
Brinell testing averages out hardness variations in weld seams and heat-affected zones, offering reliable overall readings.
Advantages and Disadvantages of the Brinell Test
Advantages:
- Simple and Economical: Straightforward setup with minimal sample preparation.
- Great for Rough Surfaces: Can be performed on unmachined or uneven surfaces
- Effective for Large Parts: Can handle components too large for other test methods
- Reliable for Soft and Medium-Hard Materials: Provides averaged results that reflect true bulk hardness
Disadvantages:
- Not Suitable for Thin Specimens: Large indentations can damage delicate materials
- Large Indentation Size: May be undesirable for precision parts or cosmetic surfaces
- Less Precision: Limited accuracy for small or finely finished materials compared to Vickers
- Unsuitable for Coatings: The test penetrates past surface layers, making it ineffective for surface coatings or thin films
Brinell vs Other Hardness Tests
To better understand the Brinell method’s place among other popular hardness tests, let’s compare it to the Vickers hardness and Rockwell hardness tests.
| Feature | Brinell Hardness | Rockwell Hardness | Vickers Hardness |
|---|---|---|---|
| Indenter | Steel/Carbide Ball | Steel Ball or Cone | Diamond Pyramid |
| Load Range | 500–3000 kgf | 15–150 kgf | 10g – 100 kgf |
| Indentation Size | Large | Medium | Small |
| Material Suitability | Soft–Medium metals | Wide range | Thin, coatings |
| Accuracy | Medium | High | Very High |
| Surface Prep | Low | Low | High |
| Common Use | Castings, forgings | QA in mass production | R&D, microstructure analysis |
Each test has its strengths. Brinell is best for rough, soft, or large items. Rockwell offers industrial efficiency, while Vickers excels in precision and versatility.
FAQ
Is the Brinell Hardness Test Suitable for Measuring the Hardness of Sintered Metal Parts?
The Brinell hardness test is generally not suitable for sintered metal parts. Its large indenter can press into surface pores, leading to inaccurate or inconsistent results. This method is better suited for dense, homogeneous materials. For powder metallurgy components, the Vickers or microhardness test is usually preferred due to their smaller indentations and higher precision.
Does Temperature Affect the Success of The Brinell Test?
Yes, the temperature of both the sample and the tester can affect the results. Therefore, it is safer to carry out this test in an ambient temperature within the ranges of 10 to 35 0C (50 to 95 0F).
Is There a Difference Between Testing Flat Surfaces and Curved Surfaces?
Yes, there are a few differences:
- The shape of indentation on a flat surface is circular, while that of a curved surface is not circular but elliptical.
- For flat surfaces, the difference between the two diameter measurements (largest and smallest) of the same indentation should not be more than a percentage of the indenter ball diameter.
- For curved surfaces, the minimum radius of the surface curvature should be two and a half times the ball diameter.


